• Home
  • Docs
    • DeepLog
      • App manual
      • DeepLog Portal
        • 1. General Information
          • 1.1. System architecture
          • 1.2. Web interface
            • 1.2.1. Header
            • 1.2.2. Main menu
            • 1.2.3. Body
            • 1.2.4. Footer
        • 2. Domains management
        • 3. List of Devices
        • 4. Devices and acquired data management
          • 4.1. Dashboard
          • 4.2. Device configuration
            • 4.2.1. Networking
            • 4.2.2. Data sampling
            • 4.2.3. Data delivery
            • 4.2.4. Analog Inputs configuration
            • 4.2.5. Digital Inputs configuration
            • 4.2.6. Networking events configuration
          • 4.3. Received data visualization
          • 4.4. Task management
          • 4.5. Firmware upgrade
        • 5. Users management
      • Hardware manual
        • 1. Overview
        • 2. Technical features
        • 3. Digital Inputs
        • 4. Analog Inputs
        • 5. Connections
          • 5.1. SIM card insertion
          • 5.2. How to connect the battery unit
          • 5.3. How to connect the antenna
          • 5.4. Mounting
          • 5.5. Connection of sensors and probes
        • 6. Side button
        • 7. Safety guidelines
        • 8. Warranty and support
        • 9. Return and repair
    • Portal
      • User manual
        • 1. Overview
        • 2. User interface
          • 2.1. Header
            • 2.1.1. User account
            • 2.1.2. Web interface
          • 2.2. Footer
          • 2.3. Main menu
          • 2.4. Content
        • 3. Users
          • 3.1. Monitoring user
          • 3.2 Monitoring and control user
          • 3.3. Administrator user
          • 3.4. System user
          • 3.5. Users management
        • 4. Customers
        • 5. Domains
        • 6. Devices
          • 6.1. Registration
          • 6.2. Device management
            • 6.2.1. Devices
            • 6.2.2. PC/Laptops
          • 6.3 Device monitoring and control
            • 6.3.1 General
            • 6.3.2 Real-time
            • 6.3.3 Logs
            • 6.3.4 Events
            • 6.3.5 Trend
            • 6.3.6 Control
            • 6.3.7 Schematic
          • 6.4 Events
          • 6.5 Data visualization
      • VPN client
        • 1. Overview
        • 2. Installing the VPN client
          • 2.1. Windows
          • 2.2. OS X
          • 2.3. Linux
      • API
        • 1. Introduction
        • 2. API overview
        • 3. API Resources
          • 3.1. API key
          • 3.2. Customer
          • 3.3. Domain
          • 3.4. Device
          • 3.5. Variable
          • 3.6. Portal log
          • 3.7. VPN
          • 3.8. VPN Packet
      • FAQ
        • 1. Why I don’t see the “Control” Tab in Device Monitoring?
        • 2. Where is the serial number that I need to enter for registering the device?
    • WE110
      • Manual for thermostat and generic control
        • 1. Overview
        • 2. Technical characteristics
        • 3. Pinout and connection
        • 4. Installation and setup
          • 4.1. Front panel button
        • 5. Using the device: APP
        • 6. Using the device: SMS
          • 6.1. User management
          • 6.2. Alarm management
          • 6.3. GSM signal level
          • 6.4. Factory reset
          • 6.5. Advanced SMS
          • 6.6. Chronothermostat commands
          • 6.7. Back-up battery (optional)
        • 7. Safety guidelines
        • 8. Warranty and support
        • 9. Return and repair
      • Manual for gate opener
        • 1. Overview
        • 2. Technical characteristics
        • 3. Pinout and connection
        • 4. Installation and setup
          • 4.1. Front panel button
        • 5. Using the device: APP
        • 6. Using the device: SMS
          • 6.1. Administrator
          • 6.2. Alarm management
          • 6.3. GSM signal level
          • 6.4. Factory reset
          • 6.5. Miscelaneous commands
          • 6.6. Back-up battery (optional)
        • 7. Safety guidelines
        • 8. Warranty and support
        • 9. Return and repair
      • Application notes
        • Gate opener
          • 1. Overview
          • 2. Electrical scheme
          • 3. Programming
            • 3.1 Mobile app for Andorid
              • 3.1.1 Profile configuration
              • 3.1.2 Administrator Configuration
              • 3.1.3 Utilization
              • 3.1.4 Menu
            • 3.2 Mobile app for iOS
              • 3.2.1 Profile Configuration
              • 3.2.2 Settings Configuration
              • 3.2.3 Utilization
            • 3.3 SMS Commands
        • Generic remote control
          • 1. Overview
          • 2. Electrical scheme
          • 3. Programming
            • 3.1 Mobile app for Andorid
              • 3.1.1 Base configuration
              • 3.1.2 Advanced Configuration
            • 3.2 Mobile app for iOS
              • 3.2.1 Base Configuration
              • 3.4.2 Advanced Configuration
            • 3.3 SMS Commands
        • Thermostat
          • 1. Overview
          • 2. Electrical scheme
          • 3. Programming
            • 3.1 Mobile app for Andorid
              • 3.1.1 Base configuration
              • 3.1.2 Advanced Configuration
            • 3.2 Mobile app for iOS
              • 3.4.1 Profile Configuration
              • 3.4.2 Base Configuration
              • 3.4.3 Advanced Configuration
            • 3.3 SMS Commands
              • 3.3.1 Base Configuration
              • 3.3.2 Advanced Configuration
        • Programmable Thermostat
          • 1. Overview
          • 2. Electrical scheme
          • 3. Programming
      • Downloads
        • 1. Apps
          • 1.1. Android
          • 1.2. iOS
    • WE111
      • Web Interface manual
        • 1. General information
          • 1.1. About this document
          • 1.2. Overview
          • 1.3. Access to the Web interface
        • 2. Variables management
          • 2.1. Generic Settings
          • 2.2. Type
          • 2.3. Variable Analog Input (AI)
          • 2.4. Variable Digital Input (DI)
            • 2.4.1. Normal
            • 2.4.2. Counter
            • 2.4.3. Flow measurement
            • 2.4.4. Time counter
          • 2.5. Variable Digital Output (DO)
          • 2.6. Virtual Variables
            • 2.6.1. Normal
            • 2.6.2. Math expression
            • 2.6.3. Date/time
            • 2.6.4. System variables
          • 2.7. Bridge between variables
        • 3. Events/Actions
          • 3.1. Events
            • 3.1.1. Events on variables
            • 3.1.2. Incoming data
          • 3.2. Actions
            • 3.2.1. Action Send Email
            • 3.2.2. Action Send SMS
            • 3.2.3. Action Send Chat
            • 3.2.4. Action Execute a Command
            • 3.2.5. Action Send data to cloud
            • 3.2.6. Action Reboot
            • 3.2.7. Action Poweroff
        • 4. Scheduler
          • 4.1. Execute recurrently
          • 4.2. Execute every
          • 4.3. Execute only once
        • 5. Variables monitoring
          • 5.1. Variables status
          • 5.2. Set/Get commands via SMS/Email/Chat
            • 5.2.1. Set
            • 5.2.2. Get
          • 5.3. Customized commands
        • 6. Data delivery
          • 6.1. Enabling variables to data delivery
          • 6.2. Configuration of data delivery
          • 6.3. HTTP/S
          • 6.4. MQTT/S
          • 6.5. MQTT/S Report
          • 6.6. Email report
        • 7. Users
          • 7.1. Create a new user
          • 7.2. Groups of users
        • 8. Connectivity
          • 8.1. Network interfaces
            • 8.1.1. Data connection and SMS
          • 8.2. Activable services
          • 8.3. Email
          • 8.4. Chat
          • 8.5. VPN
          • 8.6. DDNS
        • 9. System commands
        • 10. Diagnostic
          • 10.1. System logs
          • 10.2. Connectivity information
          • 10.3. Ping
        • 11. System operations
          • 11.1. Input configuration
          • 11.2. Configuration overview
          • 11.3. System settings
            • 11.3.1. Information about the plant
            • 11.3.2. Date and time
            • 11.3.3. Web interface personalization
          • 11.4. System information
          • 11.5. Configuration Backup/Restore
          • 11.6. Logs reset
          • 11.7. Factory reset
          • 11.8. Device upgrade
          • 11.9. Features
          • 11.10. Plugins
        • 12. Safety guidelines
        • 13. Warranty and support
        • 14. Return and repair
    • WE112
      • Web Interface manual
        • 1. General information
          • 1.1. About this document
          • 1.2. Overview
          • 1.3. Access to the Web interface
        • 2. Variables management
          • 2.1. Generic Settings
          • 2.2. Type
          • 2.3. Variable Analog Input (AI)
          • 2.4. Variable Digital Input (DI)
            • 2.4.1. Normal
            • 2.4.2. Counter
            • 2.4.3. Flow measurement
            • 2.4.4. Time counter
          • 2.5. Variable Digital Output (DO)
          • 2.6. Virtual Variables
            • 2.6.1. Normal
            • 2.6.2. Math expression
            • 2.6.3. Date/time
            • 2.6.4. System variables
          • 2.7. Bridge between variables
        • 3. Events/Actions
          • 3.1. Events
            • 3.1.1. Events on variables
            • 3.1.2. Incoming data
          • 3.2. Actions
            • 3.2.1. Action Send Email
            • 3.2.2. Action Send Chat
            • 3.2.3. Action Execute a Command
            • 3.2.4. Action Send data to cloud
            • 3.2.5. Action Reboot
            • 3.2.6. Action Poweroff
        • 4. Scheduler
          • 4.1. Execute recurrently
          • 4.2. Execute every
          • 4.3. Execute only once
        • 5. Variables monitoring
          • 5.1. Variables status
          • 5.2. Set/Get commands via Email/Chat
            • 5.2.1. Set
            • 5.2.2. Get
          • 5.3. Customized commands
        • 6. Data delivery
          • 6.1. Enabling variables to data delivery
          • 6.2. Configuration of data delivery
          • 6.3. HTTP/S
          • 6.4. MQTT/S
          • 6.5. MQTT/S Report
          • 6.6. Email report
        • 7. Users
          • 7.1. Create a new user
          • 7.2. Groups of users
        • 8. Connectivity
          • 8.1. Network interfaces
            • 8.1.1. Wi-Fi connection
          • 8.2. Activable services
          • 8.3. Email
          • 8.4. Chat
          • 8.5. VPN
          • 8.6. DDNS
        • 9. System commands
        • 10. Diagnostic
          • 10.1. System logs
          • 10.2. Connectivity information
          • 10.3. Ping
        • 11. System operations
          • 11.1. Input configuration
          • 11.2. Configuration overview
          • 11.3. System settings
            • 11.3.1. Information about the plant
            • 11.3.2. Date and time
            • 11.3.3. Web interface personalization
          • 11.4. System information
          • 11.5. Configuration Backup/Restore
          • 11.6. Logs reset
          • 11.7. Factory reset
          • 11.8. Device upgrade
          • 11.9. Features
          • 11.10. Plugins
        • 12. Safety guidelines
        • 13. Warranty and support
        • 14. Return and repair
    • WE120
      • Quick start guide
        • 1. Overview
        • 2. SIM card insertion
        • 3. Configuration
          • 3.1 Configuration example using SMS
        • 4. Firmware update
        • 5. Mounting
        • 6. Switching on
        • 7. FAQ
      • Connecting the WE120 to a computer
        • 1. Overview
        • 2. Windows
          • 2.1. Serial RS-232
          • 2.2. USB
            • 2.2.1. Windows XP
            • 2.2.2. Windows 8
            • 2.2.3. Windows 8.1
        • 3. OS X
          • 3.1. Serial RS-232
          • 3.2. USB
        • 4. Linux
          • 4.1. Serial RS-232
      • Firmware update
        • 1. Overview
        • 2. Requirements
        • 3. Firmware update using Genesys 3
      • User manual
        • 1. Overview
        • 2. Functional characteristics
          • 2.1. GSM modem
          • 2.2. Remote control
          • 2.3. I/O expansions
          • 2.4. Diagnostics and firmware upgrade
          • 2.5. Applications
        • 3. Technical characteristics
        • 4. Installation
          • 4.1. Package contents
          • 4.2. Connections and installation
          • 4.3. DIP switch
          • 4.4. SIM card insertion
          • 4.5. Switching on the WE120
          • 4.6. Meaning of the front panel LEDs
        • 5. Configuration and use
          • 5.1. Configuration modes
            • 5.1.1. App
            • 5.1.2. Genesys 3
            • 5.1.3. Configuration through SMS
          • 5.2. Configuration and use of the I/O expansions
          • 5.3. Device reset
          • 5.4. Firmware update
        • 6. Command description
        • 7. Safety guidelines
        • 8. Warranty and support
        • 9. Return and repair
      • Commands manual
        • 1. Overview
        • 2. Commands description
          • 2.1. Status and configuration
            • STAT
            • NAME
            • NUMBER
            • CENTER
            • CONFIG
            • VERSION
            • PASSWORD
            • ALARM
            • RESETALARM
            • CONFIRM
            • HELP
          • 2.2. Users management
            • USERS
            • ADD
            • DELETE
            • PROPERTIES
            • ALL
          • 2.3. Analog inputs
            • CONF AI
            • STAT AI
            • ALARMAI
          • 2.4. Thermostat
            • SETTHERM
            • THERM
            • MESSTHERM
            • STATTHERM
          • 2.5. Digital inputs
            • CONF DI
            • STAT DI
            • ALARMDI
            • COUNTER
            • START
            • STOP
          • 2.6. Digital outputs
            • CONF DO
            • ON
            • OFF
            • ONRING
          • 2.7. I/O expanders
            • EXPADD
            • EXPDEL
          • 2.8. Diagnostics
            • LOOP
            • SIGNAL
            • BOOT
            • RING
          • 2.9. Advanced commands
            • DEFAULT
            • MODEMONLY
            • SETPORT
            • EXECUTECOMMAND
        • 3. Safety guidelines
        • 4. Warranty and support
        • 5. Return and repair
      • Genesys 3
        • 1. Overview
        • 2. Installation
          • 2.1. Windows
          • 2.2. OS X
          • 2.3. Linux
        • 3. Communication initialization
        • 4. User interface
          • 4.1. Header
          • 4.2. Main menu
          • 4.3. Content
        • 5. General settings
          • 5.1. Basic settings
          • 5.2. Advanced settings
            • 5.2.1. Advanced
            • 5.2.2. Execute command
            • 5.2.3. RS232
            • 5.2.4. RS485
        • 6. Users
        • 7. I/O
          • 7.1. Analogue inputs
            • 7.1.1 Analogue inputs alarms
          • 7.2 Digital outputs
          • 7.3. Digital inputs
            • 7.3.1 Digital inputs alarms
        • 8. Expansions
          • 8.1. Adding expansions
        • 9. System
          • 9.1. Info
          • 9.2. Update
          • 9.3. Factory reset
      • Application notes
        • Thermostat
          • 1. Overview
          • 2. Programming
            • 2.1 Mobile application for Android
              • 2.1.1 Device Profile
              • 2.1.2 Variables configuration
            • 2.2 Mobile application for iOS
              • 2.2.1 Profile configuration
              • 2.2.2 Administration Configuration
              • 2.2.3 General configuration
              • 2.2.4 Variables configuration
            • 2.3 Genesys
              • 2.3.1 Profile configuration
              • 2.3.2 Analog Input configuration
              • 2.3.3 Digital Output configuration
              • 2.3.4 Digital Input configuration
            • 2.4 SMS commands
              • 2.4.1 Profile configuration
              • 2.4.2 Variables configuration
      • Reference cases
        • Water management
          • 1. Overview
          • 2. Connections
            • 2.1. Connection scheme of the WE120 #1
            • 2.2. Connection scheme of the WE120 #2
          • 3. Configuration via Genesys 3
            • 3.1. WE120 #1
            • 3.2. WE120 #2
          • 4. System operation
          • 5. System scalability
      • Downloads
        • 1. Firmware
          • 1.1. English
          • 1.2. Italian
        • 2. Genesys 3
          • 2.1. Windows
          • 2.2. OS X
          • 2.3. Linux
        • 3. Drivers
          • 3.1. Windows
          • 3.2. OS X
        • 4. Apps
          • 4.1. Android
          • 4.2. iOS
      • FAQ
        • 1. Why the WE120 does not receive any message or it does not reply to commands?
        • 2. Why the WE120 does not close/open the digital outputs?
        • 3. Why the WE120 does not send any type of message?
    • WE151
      • Web Interface manual
        • 1. General information
          • 1.1. About this document
          • 1.2. Overview
          • 1.3. Access to the Web interface
        • 2. Variables management
          • 2.1. Generic Settings
          • 2.2. Type
          • 2.3. Variables Analog Input (AI)
          • 2.4. Variables Digital Input (DI)
            • 2.4.1. Normal
            • 2.4.2. Counter
            • 2.4.3. Flow measurement
            • 2.4.4. Time counter
          • 2.5. Variables Digital Output (DO)
          • 2.6. Virtual Variables
            • 2.6.1. Normal
            • 2.6.2. Math expression
            • 2.6.3. Date/time
            • 2.6.4. System variables
          • 2.7. Bridge between variables
        • 3. Modbus
          • 3.1. Modbus Client
          • 3.2. Creation of Modbus variables
            • 3.2.1. Data type 1 bit
            • 3.2.2. Data type 8 bit
            • 3.2.3. Data type 16-32 bit
            • 3.2.4. Data type 32 bit Float
          • 3.3. Creation of Modbus commands
          • 3.4. Modbus network creation
            • 3.4.1. Client - RTU Modbus network
          • 3.5. Instant reading/writing
          • 3.6. Modbus expansions
          • 3.7 Manage Modbus errors
        • 4. Events/Actions
          • 4.1. Events
            • 4.1.1. Events on variables
            • 4.1.2. Incoming data
          • 4.2. Actions
            • 4.2.1. Action Send Email
            • 4.2.2. Action Send SMS
            • 4.2.3. Action Send Chat
            • 4.2.4. Action Execute a Command
            • 4.2.5. Action Send data to cloud
            • 4.2.6. Action Reboot
            • 4.2.7. Action Poweroff
        • 5. Scheduler
          • 5.1. Execute recurrently
          • 5.2. Execute every
          • 5.3. Execute only once
        • 6. Variables monitoring
          • 6.1. Variables status
          • 6.2. Set/Get commands via SMS/Email/Chat
            • 6.2.1. Set
            • 6.2.2. Get
          • 6.3. Customized commands
        • 7. Data delivery
          • 7.1. Enabling variables to data delivery
          • 7.2. Configuration of data delivery
          • 7.3. HTTP/S
          • 7.4. MQTT/S
          • 7.5. MQTT/S Report
          • 7.6. Email report
          • 7.7. FTP/S
        • 8. Users
          • 8.1. Create a new user
          • 8.2. Groups of users
        • 9. Connectivity
          • 9.1. Network interfaces
            • 9.1.1. Data connection and SMS
          • 9.2. Activable services
          • 9.3. Email
          • 9.4. Chat
          • 9.5. VPN
          • 9.6. DDNS
        • 10. System commands
        • 11. Diagnostic
          • 11.1. System logs
          • 11.2. Connectivity information
          • 11.3. Ping
        • 12. System operations
          • 12.1. Input configuration
          • 12.2. Configuration overview
          • 12.3. System settings
            • 12.3.1. Information about the plant
            • 12.3.2. Date and time
            • 12.3.3. Web interface personalization
          • 12.4. System information
          • 12.5. Configuration Backup/Restore
          • 12.6. Logs reset
          • 12.7. Factory reset
          • 12.8. Device upgrade
          • 12.9. Features
          • 12.10. Plugins
        • 13. Safety guidelines
        • 14. Warranty and support
        • 15. Return and repair
    • WE152
      • Web Interface manual
        • 1. General information
          • 1.1. About this document
          • 1.2. Overview
          • 1.3. Access to the Web interface
        • 2. Variables management
          • 2.1. Generic Settings
          • 2.2. Type
          • 2.3. Variables Analog Input (AI)
          • 2.4. Variables Digital Input (DI)
            • 2.4.1. Normal
            • 2.4.2. Counter
            • 2.4.3. Flow measurement
            • 2.4.4. Time counter
          • 2.5. Variables Digital Output (DO)
          • 2.6. Virtual Variables
            • 2.6.1. Normal
            • 2.6.2. Math expression
            • 2.6.3. Date/time
            • 2.6.4. System variables
          • 2.7. Bridge between variables
        • 3. Modbus
          • 3.1. Modbus Client
          • 3.2. Creation of Modbus variables
            • 3.2.1. Data type 1 bit
            • 3.2.2. Data type 8 bit
            • 3.2.3. Data type 16-32 bit
            • 3.2.4. Data type 32 bit Float
          • 3.3. Creation of Modbus commands
          • 3.4. Modbus network creation
            • 3.4.1. Client - RTU Modbus network
          • 3.5. Instant reading/writing
          • 3.6. Modbus expansions
          • 3.7 Manage Modbus errors
        • 4. Events/Actions
          • 4.1. Events
            • 4.1.1. Events on variables
            • 4.1.2. Incoming data
          • 4.2. Actions
            • 4.2.1. Action Send Email
            • 4.2.2. Action Send Chat
            • 4.2.3. Action Execute a Command
            • 4.2.4. Action Send data to cloud
            • 4.2.5. Action Reboot
            • 4.2.6. Action Poweroff
        • 5. Scheduler
          • 5.1. Execute recurrently
          • 5.2. Execute every
          • 5.3. Execute only once
        • 6. Variables monitoring
          • 6.1. Variables status
          • 6.2. Set/Get commands via Email/Chat
            • 6.2.1. Set
            • 6.2.2. Get
          • 6.3. Customized commands
        • 7. Data delivery
          • 7.1. Enabling variables to data delivery
          • 7.2. Configuration of data delivery
          • 7.3. HTTP/S
          • 7.4. MQTT/S
          • 7.5. MQTT/S Report
          • 7.6. Email report
          • 7.7. FTP/S
        • 8. Users
          • 8.1. Create a new user
          • 8.2. Groups of users
        • 9. Connectivity
          • 9.1. Network interfaces
            • 9.1.1. Wi-Fi connection
          • 9.2. Activable services
          • 9.3. Email
          • 9.4. Chat
          • 9.5. VPN
          • 9.6. DDNS
        • 10. System commands
        • 11. Diagnostic
          • 11.1. System logs
          • 11.2. Connectivity information
          • 11.3. Ping
        • 12. System operations
          • 12.1. Input configuration
          • 12.2. Configuration overview
          • 12.3. System settings
            • 12.3.1. Information about the plant
            • 12.3.2. Date and time
            • 12.3.3. Web interface personalization
          • 12.4. System information
          • 12.5. Configuration Backup/Restore
          • 12.6. Logs reset
          • 12.7. Factory reset
          • 12.8. Device upgrade
          • 12.9. Features
          • 12.10. Plugins
        • 13. Safety guidelines
        • 14. Warranty and support
        • 15. Return and repair
    • WE200
      • Quick start guide
        • 1. Overview
        • 2. Inserting the SIM card
        • 3. Turning-on the device
        • 4. Logging in
      • Software Manual
        • 1. General information
          • 1.1. About this document
          • 1.2. Overview
        • 2. Remote Access and Remote Maintenance
          • 2.1 Configuration
            • 2.2 Functioning
        • 3. Connectivity
          • 3.1. Network interfaces
            • 3.1.1. Data connection and SMS
            • 3.1.2. LAN connection
            • 3.1.3. Wi-Fi connection
          • 3.2. Network services
            • 3.2.1. Email
            • 3.2.2. VPN
            • 3.2.3. DDNS
          • 3.3. NAT and Port Forwarding
        • 4. I/O
          • 4.1. Digital Input
          • 4.2. Digital Output
          • 4.3. Variables status
        • 5. Users
          • 5.1. How to create a new user
          • 5.2. Users group
        • 6. System operation
          • 6.1. System settings
            • 6.1.1. Information about the system
            • 6.1.2. Date and time
            • 6.1.3. Web interface personalization
          • 6.2. System information
          • 6.3. Backup/Restore function
          • 6.4. Delete log
          • 6.5. Factory reset
          • 6.6. Device upgrade
          • 6.7. Plugins
        • 7. Commands
        • 8. Diagnostic
          • 8.1. System Log
          • 8.2. Information of connectivity
          • 8.3. Ping
        • 10. Safety guidelines
        • 11. Warranty and support
        • 12. Return and repair
      • Hardware manual
        • 1. Overview
        • 2. Technical characteristics
        • 3. Hardware description
        • 3.1. Connections
          • 3.2. Connector electrical characteristics
          • 3.3. Front panel
        • 4. Installation
          • 4.1. SIM card and connections
          • 4.2. System start-up
          • 4.3. Logging in the web interface
        • 5. Power off and reboot
        • 6. Stand-by mode
          • 6.1. Entering the Stand-by mode
          • 6.2. Leaving the Stand-by mode
        • 7. Network recovery
        • 8. Safety guidelines
        • 9. Warranty and support
        • 10. Return and repair
      • Application notes
        • Remote Access
          • 1. Overview
            • 1.1. How it works
          • 2. Before you start
            • 2.1. VPN
            • 2.2. QuickTunnel
          • 3. How to establish a VPN connection
            • 3.1. How to connect WE200 to the VPN network
            • 3.2. How to connect the PC to the VPN network
          • 4. Serial ports configuration
            • 4.1. How to enable the serial ports on WE200
            • 4.2. How to create virtual ports on the PC
      • QuickTunnel
        • 1. Overview
        • 2. Installation
          • 2.1. Windows
          • 2.2. OS X
          • 2.3. Linux
        • 3. Login
        • 4. System Interface
        • 5. VPN connection
        • 6. Virtual Serial Ports configuration
      • Downloads
        • 1. QuickTunnel 1.0.0
          • 1.1. Windows
          • 1.2. OS X
          • 1.3. Linux
    • WE300
      • Quick start guide
        • 1. Overview
        • 2. Inserting the SIM card
        • 3. Turning-on the device
        • 4. Logging in
      • Hardware manual
        • 1. Overview
        • 2. Technical characteristics
        • 3. Connections
          • 3.1. Bottom connector
            • 3.1.1. Connector electrical characteristics
          • 3.2. Front panel
        • 4. Installation
          • 4.1. SIM card and connections
          • 4.3. System start-up
          • 4.4. Logging in the web interface
        • 5. Power off and reboot
        • 6. Stand-by mode
          • 6.1. Entering the Stand-by mode
          • 6.2. Leaving the Stand-by mode
        • 7. Network recovery
        • 8. Safety guidelines
        • 9. Warranty and support
        • 10. Return and repair
      • Software manual
        • 1. General information
          • 1.1. About this document
          • 1.2. Overview
        • 2. Variables
          • 2.1. Generic variables
          • 2.2. Type
          • 2.3. Analog input variables (AI)
          • 2.4. Digital input vriables (DI)
            • 2.4.1. Normal
            • 2.4.2. Counter
            • 2.4.3. Time counter
          • 2.5. Digital output variables (DO)
        • 3. Modbus
          • 3.1. Master Modbus
          • 3.2. Creation of Modbus variables
            • 3.2.1. 1Bit data type
            • 3.2.2. 8 bit data type
            • 3.2.3. 16-32 bit data type
            • 3.2.4. 32 bit float data type
          • 3.3. Creation of Modbus commands
          • 3.4. Modbus network creation
            • 3.4.1. Master - RTU Modbus network
            • 3.4.2. Master - TCP Modbus network
          • 3.5. Istant reading
          • 3.6. Modbus expansions
          • 3.7 Manage Modbus errors
        • 4. Events/Actions
          • 4.1. Events
            • 4.1.1. Event on variable
            • 4.1.2. Incoming data
          • 4.2. Actions
            • 4.2.1. Send Email
            • 4.2.2. Send SMS
            • 4.2.3. Execute command
            • 4.2.4. Ring a user action
            • 4.2.5. Reboot action
            • 4.2.6. Power off action
        • 5. Scheduler
          • 5.1. Execute recurrently
          • 5.2. Execute every
          • 5.3. Execute only once
        • 6. Variables monitoring
          • 6.1. Variables status
          • 6.2. Set/Get via SMS/Email commands
            • 6.2.1. Set
            • 6.2.2. Get
        • 7. Data sending
          • 7.1. Enabling of the variable for the data sending
          • 7.2. Configuration data sending
            • 7.2.1. Server
            • 7.2.2. Email report
        • 8. Datalogger
          • 8.1. Enable log on variable
          • 8.2. Data visualization on tab
          • 8.3. Data export
        • 9. Users
          • 9.1. How to create a new user
          • 9.2. Users group
        • 10. Settings
          • 10.1. Connectivity
            • 10.1.1. LAN connection
            • 10.1.2. SIM parameters
            • 10.1.3. GPRS connection
            • 10.1.4. SMS
            • 10.1.5. Ring
            • 10.1.6. Email
          • 10.2. System settings
            • 10.2.1. Information about the system
            • 10.2.2. Date and time
            • 10.2.3. Web interface personalization
        • 11. Commands
        • 12. Diagnostic
          • 12.1. System Log
          • 12.2. Information of connectivity
          • 12.3. Ping
        • 13. System operation
          • 13.1. System information
          • 13.2. Backup/Restore function
          • 13.3. Delete log
          • 13.4. Factory reset
          • 13.5. Device upgrade
          • 13.6. Features
        • 14. Safety guidelines
        • 15. Warranty and support
        • 16. Return and repair
    • WE500
      • Quick start guide
        • 1. Overview
        • 2. Inserting the SIM card
        • 3. Turning-on the device
        • 4. Logging in
      • Hardware manual
        • 1. Overview
        • 2. Technical characteristics
        • 3. Connections
          • 3.1. Top connector
          • 3.2. Bottom connector
            • 3.2.1. Connector electrical characteristics
          • 3.3. Front panel
        • 4. Installation
          • 4.1. SIM card and connections
          • 4.2. System start-up
          • 4.3. Logging in the web interface
        • 5. Power off and reboot
        • 6. Stand-by mode
          • 6.1. Entering the Stand-by mode
          • 6.2. Leaving the Stand-by mode
        • 7. Network recovery
        • 8. Safety guidelines
        • 9. Warranty and support
        • 10. Return and repair
      • Software Manual
        • 1. General information
          • 1.1. About this document
          • 1.2. Overview
        • 2. Variables
          • 2.1. Generic variables
          • 2.2. Type
          • 2.3. Analog input variables (AI)
          • 2.4. Digital input variables (DI)
            • 2.4.1. Normal
            • 2.4.2. Counter
            • 2.4.3. Flow measurement
            • 2.4.4. Time counter
          • 2.5. Digital output variables (DO)
          • 2.6. Virtual variables
          • 2.7. Bridge between variables
        • 3. Modbus
          • 3.1. Master/Slave Modbus
          • 3.2. Creation of Modbus variables
            • 3.2.1. 1 bit data type
            • 3.2.2. 8 bit data type
            • 3.2.3. 16-32 bit data type
            • 3.2.4. 32 bit float data type
          • 3.3. Creation of Modbus commands
          • 3.4. Modbus network creation
            • 3.4.1. Master - RTU Modbus network
            • 3.4.2. Slave - RTU Modbus network
            • 3.4.3. Master - TCP Modbus network
            • 3.4.4. Slave - TCP Modbus network
          • 3.5. Instant reading
          • 3.6. Modbus expansions
          • 3.7 Manage Modbus errors
        • 4. Events/Actions
          • 4.1. Events
            • 4.1.1. Event on variable
            • 4.1.2. Event on event
            • 4.1.3. Event on formula
            • 4.1.4. Incoming data
          • 4.2. Actions
            • 4.2.1. Send Email
            • 4.2.2. Send SMS
            • 4.2.3. Execute command
            • 4.2.4. Send IP cam snapshot to portal action
            • 4.2.5. Reboot action
            • 4.2.6. Power off action
        • 5. Scheduler
          • 5.1. Execute recurrently
          • 5.2. Execute every
          • 5.3. Execute only once
        • 6. Variables monitoring
          • 6.1. Variables status
          • 6.2. Set/Get via SMS/Email commands
            • 6.2.1. Set
            • 6.2.2. Get
          • 6.3. Customize commands
        • 7. Data sending
          • 7.1. Enabling of the variable for the data sending
          • 7.2. Configuration data sending
            • 7.2.1. Server
            • 7.2.2. FTP
            • 7.2.3. Dropbox
            • 7.2.4. Email report
        • 8. Datalogger
          • 8.1. Enable log on variable
          • 8.2. Data visualization on diagram
          • 8.3. Data visualization on tab
          • 8.4. Data export
          • 8.5. How to save data on USB
        • 9. Users
          • 9.1. How to create a new user
          • 9.2. Users group
        • 10. Connectivity
          • 10.1. Network interfaces
            • 10.1.1. Data connection and SMS
            • 10.1.2. LAN connection
            • 10.1.3. Wi-Fi connection
          • 10.2. Network services
            • 10.2.1. Email
            • 10.2.2. VPN
            • 10.2.3. DDNS
          • 10.3. Remote Access and Remote Maintenance
            • 10.3.1 Configuration
            • 10.3.2 Functioning
          • 10.4. NAT and Port Forwarding
        • 11. Commands
        • 12. Diagnostic
          • 12.1. System Log
          • 12.2. Information of connectivity
          • 12.3. Ping
        • 13. System operation
          • 13.1. Configuration Overview
          • 13.2. System settings
            • 13.2.1. Information about the system
            • 13.2.2. Date and time
            • 13.2.3. Web-cam
            • 13.2.4. GPS
            • 13.2.5. Web interface personalization
          • 13.3. System information
          • 13.4. Backup/Restore function
          • 13.5. Delete log
          • 13.6. Factory reset
          • 13.7. Device upgrade
          • 13.8. Features
          • 13.9. Plugins
        • 14. Safety guidelines
        • 15. Warranty and support
        • 16. Return and repair
      • Plugins
        • 1. Overview
        • 2. IoT Platforms
          • 2.1 Cumulocity
          • 2.2 Carriots
          • 2.3 Evrythng
          • 2.4 Cloud of Things
        • 3. Sensors
          • 3.1 Anemometer
          • 3.2 Wind vane
          • 3.3 NTC Sensor
      • Application notes
        • Direct connection to PC
          • 1. Overview
          • 2. Windows
            • 2.1 Windows XP
            • 2.2 Windows 7
            • 2.3 Windows 8 / 8.1
          • 3. Mac OS X
          • 4. Linux
        • Scheduler
          • 1. Overview
          • 2. Execute only once
          • 3. Execute every…
          • 4. Execute recurrently
        • VPN
          • 1. Overview
          • 2. Communication flow
        • Modbus master/slave configuration
          • 1. Overview
          • 2. WE500 A Slave configuration
            • 2.1 General configuration
            • 2.2 Modbus variables configuration
            • 2.3 Modbus commands configuration
              • 2.3.1 Commands of Var_A_01 variable
              • 2.3.2 Commands of Var_A_02 variable
            • 2.4 TCP modbus network Slave configuration
          • 3. WE500 B Master configuration
            • 3.1 General configuration
            • 3.2 Configurazione variabili modbus
            • 3.3 Modbus commands configuration
              • 3.3.1 Commands of the variable Var_B_01
              • 3.3.2 Commands of the variable Var_B_02
            • 3.4 TCP modbus network Master configuration
        • Modbus multi-network
          • 1. Overview
          • 2. RS-232 serial port configuration
            • 2.1 Modbus variable
            • 2.2 Modbus command
            • 2.3 Modbus network
          • 3. RS-485 serial port configuration
            • 3.1 Modbus variable
            • 3.2 Modbus command
            • 3.3 Modbus network
          • 4. Other examples of modbus network configurations
        • Cumulocity
          • 1. Overview
          • 2. Loggin in
          • 3. Configuring the device
            • 3.1. WAN
            • 3.2. LAN
            • 3.3. WLAN
          • 4. Creating variables
          • 5. Interact with Cumulocity
            • 5.1. Device information
            • 5.2. Software update
            • 5.3. Restart device
        • Using a remote desktop application
          • 1. Overview
          • 2. Windows 10 configuration
          • 3. WE500 configuration
      • Reference cases
        • Water management
          • 1. Overview
          • 2. Tank level monitoring
            • 2.1. The Story-Line
            • 2.2. The Solution’s Approach
            • 2.3. Benefits
        • Energy generators
          • 1. Overview
          • 2. Off-grid power generators
            • 2.1. The Story-Line
            • 2.2. The Solution’s Approach
            • 2.3. Benefits
        • Photovoltaic
          • 1. Overview
          • 2. PV plant with several inverters
            • 2.1. The Story-Line
            • 2.2. The Solution’s Approach
            • 2.3. Benefits
      • API
        • 1. Overview
        • 2. Resources
          • 2.1 API key
          • 2.2 Variables
          • 2.3 Variables status
          • 2.4 Groups of variables
          • 2.5 Group of variables membership
        • 3. Examples
          • 3.1 Filling a water tank
      • FAQ
        • 1. Why the WE500 does not receive any message or it does not reply to commands?
        • 2. At what point should the GPRS light come up?
        • 3. How to use a SIM card?
    • WE500R
      • Quick start guide
        • 1. Overview
        • 2. Inserting the SIM cards
        • 3. Turning-on the device
        • 4. Logging in
      • Hardware manual
        • 1. Overview
        • 2. Technical characteristics
        • 3. Connections
          • 3.1. Back panel
            • 3.1.1. Electrical characteristics
          • 3.2. Front panel
        • 4. Installation
          • 4.1. SIM cards and connections
          • 4.2. System start-up
          • 4.3. Logging in the web interface
        • 5. Power off and reboot
        • 6. Stand-by mode
          • 6.1. Entering the Stand-by mode
          • 6.2. Leaving the Stand-by mode
        • 7. Network recovery
        • 8. Safety guidelines
        • 9. Warranty and support
        • 10. Return and repair
      • Software Manual
        • 1. General information
          • 1.1. About this document
          • 1.2. Overview
        • 2. Variables
          • 2.1. Generic variables
          • 2.2. Type
          • 2.3. Analog input variables (AI)
          • 2.4. Digital input vriables (DI)
            • 2.4.1. Normal
            • 2.4.2. Counter
            • 2.4.3. Flow measurement
            • 2.4.4. Time counter
          • 2.5. Digital output variables (DO)
          • 2.6. Virtual variables
          • 2.7. Bridge between variables
        • 3. Modbus
          • 3.1. Master/Slave Modbus
          • 3.2. Creation of Modbus variables
            • 3.2.1. 1Bit data type
            • 3.2.2. 8 bit data type
            • 3.2.3. 16-32 bit data type
            • 3.2.4. 32 bit float data type
          • 3.3. Creation of Modbus commands
          • 3.4. Modbus network creation
            • 3.4.1. Master - RTU Modbus network
            • 3.4.2. Slave - RTU Modbus network
            • 3.4.3. Master - TCP Modbus network
            • 3.4.4. Slave - TCP Modbus network
          • 3.5. Istant reading
          • 3.6. Modbus expansions
          • 3.7 Manage Modbus errors
        • 4. Events/Actions
          • 4.1. Events
            • 4.1.1. Event on variable
            • 4.1.2. Event on event
            • 4.1.3. Event on formula
            • 4.1.4. Incoming data
          • 4.2. Actions
            • 4.2.1. Send Email
            • 4.2.2. Send SMS
            • 4.2.3. Execute command
            • 4.2.4. Ring a user action
            • 4.2.5. Reboot action
            • 4.2.6. Power off action
        • 5. Scheduler
          • 5.1. Execute recurrently
          • 5.2. Execute every
          • 5.3. Execute only once
        • 6. Variables monitoring
          • 6.1. Variables status
          • 6.2. Set/Get via SMS/Email commands
            • 6.2.1. Set
            • 6.2.2. Get
          • 6.3. Customize commands
        • 7. Data sending
          • 7.1. Enabling of the variable for the data sending
          • 7.2. Configuration data sending
            • 7.2.1. Server
            • 7.2.2. FTP
            • 7.2.3. Dropbox
            • 7.2.4. Email report
        • 8. Datalogger
          • 8.1. Enable log on variable
          • 8.2. Data visualization on diagram
          • 8.3. Data visualization on tab
          • 8.4. Data export
          • 8.5. How to save data on USB
        • 9. Users
          • 9.1. How to create a new user
          • 9.2. Users group
        • 10. Settings
          • 10.1. Connectivity
            • 10.1.1. LAN connection
            • 10.1.2. WLAN connection
            • 10.1.3. SIM parameters
            • 10.1.4. GPRS/HSPA connection
            • 10.1.5. SMS
            • 10.1.6. Ring
            • 10.1.7. Email
            • 10.1.8. VPN
            • 10.1.9 NAT
          • 10.2. System settings
            • 10.2.1. Information about the system
            • 10.2.2. Date and time
            • 10.2.3. Web-cam
            • 10.2.4. GPS
            • 10.2.5. Web interface personalization
        • 11. Commands
        • 12. Diagnostic
          • 12.1. System Log
          • 12.2. Information of connectivity
          • 12.3. Ping
        • 13. System operation
          • 13.1. System information
          • 13.2. Backup/Restore function
          • 13.3. Delete log
          • 13.4. Factory reset
          • 13.5. Device upgrade
          • 13.6. Features
          • 13.7. Plugins
        • 14. Safety guidelines
        • 15. Warranty and support
        • 16. Return and repair
      • API
        • 1. Overview
        • 2. Resources
          • 2.1 API key
          • 2.2 Variables
          • 2.3 Variables status
          • 2.4 Groups of variables
          • 2.5 Group of variables membership
        • 3. Examples
          • 3.1 Filling a water tank
      • VPN
        • 1. Overview
        • 2. Communication flow
    • Touch Panels
      • TP100
        • User manual
          • 1. Overview
          • 2. Startup and Home Screen
          • 3. Tile Description
            • 3.1. Header Colors
            • 3.2. Tile Size
          • 4. Preset Mode
            • 4.1. Setting the Value of a Register
            • 4.2. Real-time Graph
          • 5. Communication Error Reporting
            • 5.1. Register Error
            • 5.2. At Least One Register Error
            • 5.3. All Registers in Error
          • 6. Settings Menu
          • 7. How to Configure TP100
          • 8. Uploading Configuration
          • 9. Downloading Configuration
          • 10. Firmware Update
            • 10.1. Device Reset
        • Configuration Wizard
          • 1. Overview
          • 2. Description of Fields on the Page
          • 3. Configuration - Configuration Parameters
            • 3.1. Supported Modbus Functions
              • 3.1.1. Read Functions
              • 3.1.2. Write Functions
            • 3.2. Variable Type
          • 4. Visualization - Display Preview
          • 5. Upload/Download - Downloading and Uploading Configuration
        • Hardware manual
          • 1. Overview
          • 2. Technical Specifications
          • 3. Connectors and Pinout
            • 3.1. Screw Terminal Pinout
          • 4. Warnings
          • 5. Warranty and Support
          • 6. Returns and Repairs
        • JSON Configuration file
          • 1. Overview
          • 2. Formatting
          • 3. Arrangement of Tiles
          • 4. Parameters Description
            • 4.1. modbusType
            • 4.2. Parameter: modbusCmdRead
            • 4.3. Parameter: modbusCmdWrite
            • 4.3. Parameter: alarm
    • Power supplies
      • UPS500 manual
        • 1. Overview
        • 2. Technical characteristics
          • 2.1. Output features
        • 3. Installation
        • 4. Configuration
        • 5. Safety guidelines
        • 6. Warranty and support
        • 7. Return and repair
    • Expansions
      • XP100
        • 1. Overview
        • 2. Technical specifications
        • 3. XP100 6DI - 6DO
          • 3.1 Technical specifications
        • 4. XP100 16DI
          • 4.1 Technical specifications
        • 5. XP100 4AI - 4T
          • 5.1 Technical charateristics
          • 5.2 Inputs configuration
        • 6. Installation
          • 6.1. Connection
          • 6.2. Setting the slave address
          • 6.3 DIP switch
          • 6.4 LEDs meaning
        • 7. Warnings
        • 8. Warranty and support
        • 9. Return and repair
      • XP500
        • 1. Overview
        • 2. Technical characteristics
          • 2.1. 4AI-I
          • 2.2. 8AI-I
          • 2.3. 4AI-V
          • 2.4. 8AI-V
          • 2.5. 4DI-4DO
          • 2.6. 8DI-8DO
          • 2.7. 12DI
          • 2.8. 4T
          • 2.9. Combo
        • 3. Installation and configuration
        • 4. INIT mode
        • 5. Warnings
        • 6. Warranty and support
        • 7. Return and repair
      • XP500/ETH
        • 1. Overview
        • 2.Technical Features
          • 2.1. 4AI-I/V
          • 2.2. 4AO
          • 2.3. 8DI-4DO
          • 2.4. 8DI-8DO
        • 3. Web Interface
          • 3.1. Network settings
          • 3.2. System configuration
          • 3.3. Software update
          • 3.4. I/O
            • 3.4.1. 4AI
            • 3.4.2. 4AO
            • 3.4.3. 8DI4DO
            • 3.4.4. 8DI8DO
        • 4. Configuration
        • 5. Reset to factory settings
          • 5.1. Mode INIT
          • 5.2. Reset through button
        • 6. Warnings
        • 7. Warranty and assistance
        • 8. Return and repairs
      • DIS500
        • Hardware Manual
          • 1. Overview
          • 2. Technical features
          • 3. Installation
            • 3.1 Frontal view and button panel
            • 3.2 Rear view and terminals
          • 4. INIT mode
          • 5. Safety guidelines
          • 6. Warranty and support
          • 7. Return and repair
        • Software Manual
          • 1. Preliminary Operations
          • 2. Device Connection
          • 3. Register Management
            • 3.1 Address (%R6)
            • 3.2 Gateway Mask (%R17)
          • 4. Programming
            • 4.1 Register Block
            • 4.2 Display Block
            • 4.3 GoTo Block
          • 5. Display Visualization
            • 5.1 Abc Object
            • 5.2 123 Object
          • 6. Upload Configuration
  • Languages
    • English
    • Italiano
  • DeepLog
  • Portal
  • WE110
  • WE111
  • WE112
  • WE120
  • WE151
  • WE152
  • WE200
  • WE300
    • Quick start guide
    • Hardware manual
    • Software manual
  • WE500
  • WE500R
  • Touch Panels
  • Power supplies
  • Expansions

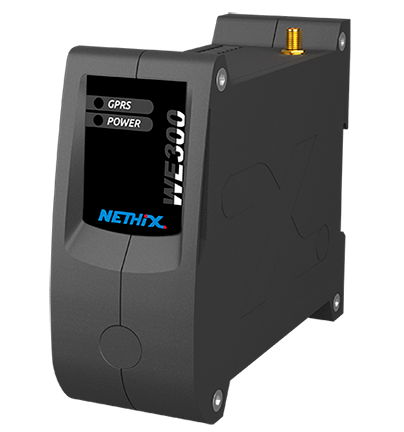
WE300

../_images/we300.png
  • Quick start guide
  • Hardware manual
  • Software manual

Back to top

nethix.com

© Copyright 2024, Nethix Srl.