1. Overview
The following manual demonstrate how to use a WE500 with Cumulocity. It describes how to:
- Configure networking parameters.
- Create variables.
- Connect the device to your Cumulocity account.
Further information regarding the web interface and the functionality of WE500, can be obtained from the official WE500 documentation.
2. Loggin in
The support for Cumulocity can be configured through WE500’s web interface. To do so,
login to the user interface using your credentials.
The default network configuration for connecting to WE500 is:
- IP address: 192.168.1.160
- Netmask: 255.255.255.0
- Gateway: 192.168.1.1
- DNS: 8.8.8.8
It is necessary that the PC used for connecting to WE500 belongs to the same network 192.168.1.x.
For connecting to WE500, use a standard web browser and enter the following address in the URL bar:
192.168.1.160

The authentication procedure of the web interface will ask for the user credentials.
The default username and password are the following:
- Username: admin
- Password: admin
Hint
It’s strongly recommended to change the default password after the first login.
3. Configuring the device
WE500 need an Internet connection to be able to connect to your Cumulocity account. There are three different ways to establish an Internet connection with WE500:
- WAN
- LAN
- WLAN (if available)
3.1. WAN
To establish a “WAN” connection through WE500 you need first to insert a SIM card as shown below:
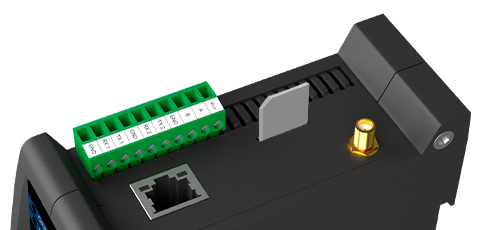
The SIM card contacts must face the pluggable screw terminal and the cut angle faced to the front of the device.
Warning
Avoid to insert the SIM card when the device is turned on. After turning off the device and removing the power source, the SIM card can be inserted/removed.
After that, connect a quad band GSM antenna with the right cable and, if required, the extension being sure to have a satisfactory GSM signal, then turn on the device.
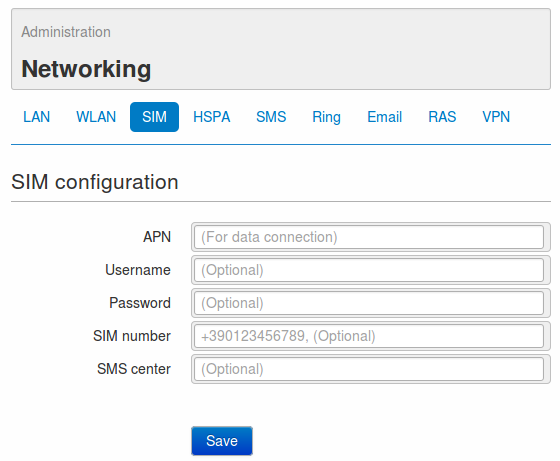
After the login procedure, navigate to the Administration –> Networking –> SIM tab.
Fill the required fields with the correct parameters, according to your provider.
WE500 is ready now to establish a WAN connection. In order to activate the connection, navigate to the Administration –> Networking –> HSPA tab.
Once enabled the service with a flag on the field Enable, it’s required to specify whether the connection must be always on or on demand.
- Always on: WE500 will keep the connection always on. In case it should be interrupted (missing credit, Signal not available..) the connection will be restored as soon as possible.
- On demand: the connection is activated on request by an authorized user through a wake-up message (11. Commands) and after 15 minutes is automatically disabled. If the activated services require a connection for data sending, it will automatically be closed at the end of the configured operations.
If the parameters have been properly configured, after a few minutes the HSPA connection will be activated. On the status panel, positioned on the right side of the web interface, the HSPA indicator will become green and beneath it the connection uptime and the relevant IP address will be displayed.
It’s possible to check the quality of the connection by using the diagnostic tool Ping (12.3. Ping).
Further information regarding the status of the connection can be found on page Administration → Diagnostics → Networking (12.2. Information of connectivity).
3.2. LAN
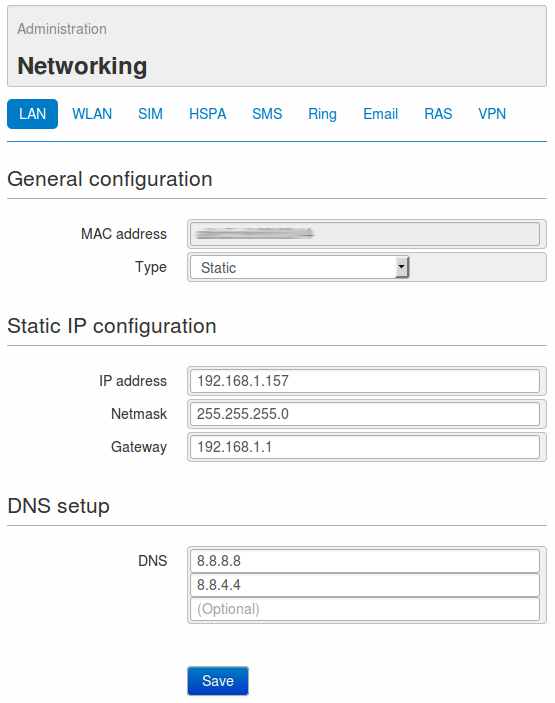
LAN parameters can be configured from Administration -> Networking -> LAN tab.
First of all the MAC address of the device will be displayed, with the option of using the LAN network on static IP address or on DHCP.
If the Static address will be selected, the following parameters must be set for the correct operation of the service:
- IP address static IP address assigned to WE500. Make sure that the address is available and not used on other devices.
- Netmask Subnet mask. A valid netmask must be entered, according to the specifications of the own local LAN.
- Gateway Network gateway
- DNS DNS that can be assigned to WE500 ( max. 3)
After settings modification WE500 requires a reboot in order to activate them.
For further information regarding the status of the LAN connection, see page Diagnostics → Networking on section LAN Interface ( see 12. Diagnostic).
3.3. WLAN
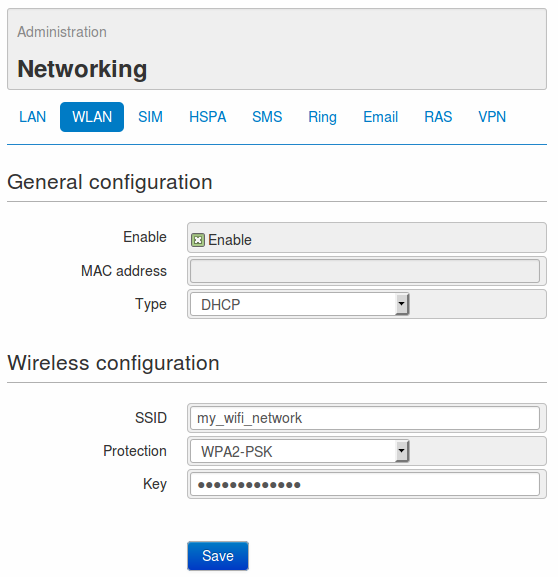
WLAN parameters can be configured from Administration -> Networking -> WLAN tab.
Please note that this option is available only if, at order confirmation, the Wi-Fi on USB port option has been selected.
First of all it will be displayed the MAC address of the Wi-Fi device connected to WE500, and it will be given the possibility to choose between a static or dynamic IP address.
Choosing the static IP address, all necessary parameters for a proper functioning of the service will be required.
- Choosing a static IP-address the following parameters must be set for a proper operation of the service:
- IP address: static IP address assigned to WE500. Make sure that the address is available and not used on other devices.
- Netmask: Subnet mask. A valid netmask must be entered, according to the specifications of the own local LAN.
- Gateway: Network gateway
Then the access data of the Wi-Fi network, where WE500 has to get connected to, have to be defined:
- SSID: Complete name of the Wi-Fi network
- Protection: Encryption of the access key
- Key: type of key/password for the authentication
After clicking on Save, WE500 starts to scan the on-site available Wi-Fi networks. Once found the network with the previously set SSID, WE500 will make the authentication using the indicated parameters
For further information regarding the status of the WLAN connection, it’s possible to enter the page Administration → Diagnostics → Networking on section WLAN Interface (see 12. Diagnostic).
4. Creating variables
A variable indicates the value of one parameter of the monitoring/control system.
For example, the variable called temperature indicates the value of the temperature measured by an analogical probe.
Variables are fundamental elements of the system, since they indicate the value of the monitored parameters that are sent Cumulocity.
In order to do that, it’s necessary to create a new variable and to enable the Portal sending option on the variable creation page.
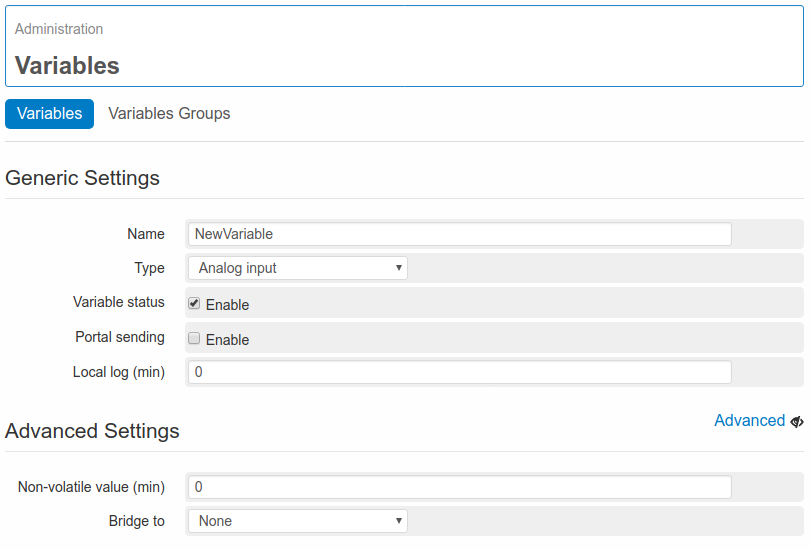
Navigate to Administration → Variables → Variables tab and click New, in order to create a new variable.
Many different types of variables are available, and for each of them parameters may differ. Only the section Generic Variable is valid for all types of variables. This section is structured as follows:
- Name: The name to be assigned to the variable. All alpha-numeric characters, and the character “_” are supported.
- Type: This allows to select the type of the variable. For each variable type the setting-parameters are different, see chapter 2.2. Type.
- Variable Status: enable/disable the variable.
- Portal sending: It allows to enable/disable the sending of the variable value to Cumulocity portal. For further information regarding the data-sending, see relevant section 7. Data sending data sending.
- Non-volatile value: It allows to save the variable value every X minute and everytime the device is switched off or rebooted.
- Local log (min): It allows to set a different sampling time (in minutes) for each variable. The recorded data can be then exported or displayed in charts or tabs. For further information see section 8. Datalogger.
5. Interact with Cumulocity
Once established an Internet connection and created at least one variable, it is possible to let WE500 interact with the Cumulocity platform using the account credentials.
To do so, navigate to Administration → Cloud → Cumulocity tab.
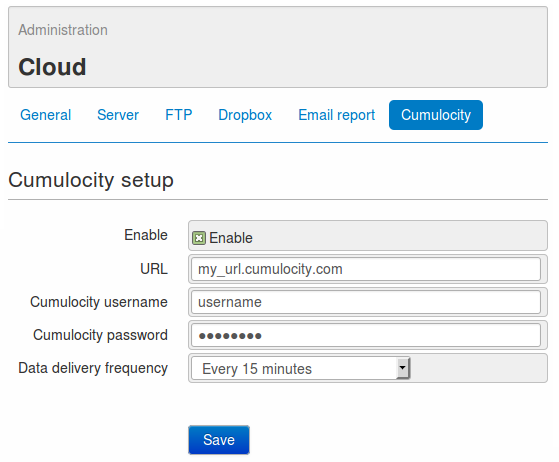
On this page it’s possible to set the following parameters:
- Enable: It allows to enable or disable the data sending to the Cumulocity platform
- URL: It’s the URL for entering the own reserved area of Cumulocity
- Username: The username used for accessing the platform
- Password: The password used for accessing the platform
- Data delivery frequency: Sets the number of minutes between each data delivery by WE500 to Cumulocity.
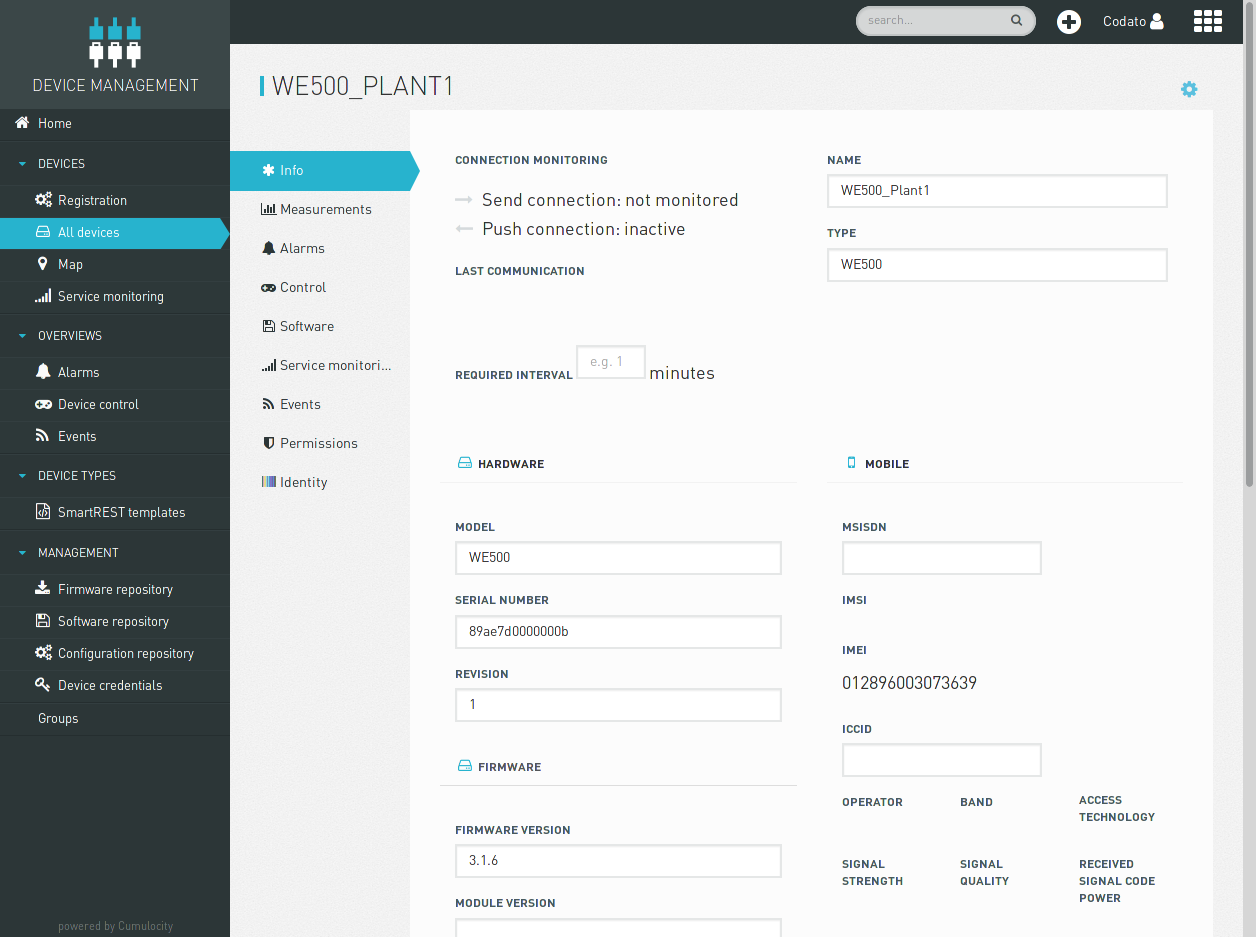
By clicking on the Save button, WE500 will register automatically in Cumulocity and will start sending variables that can be monitored from Devices → All devices → Measurements:

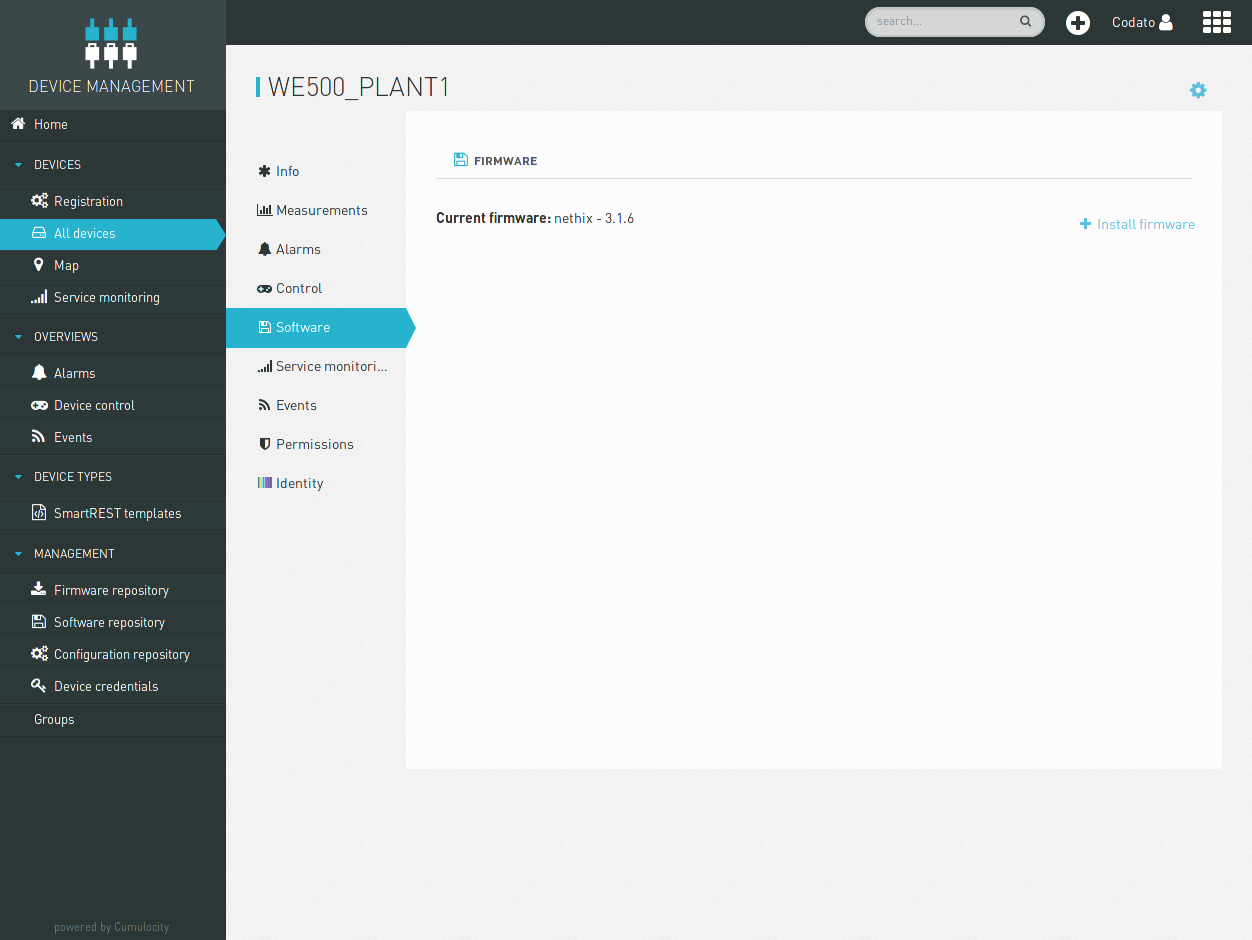
5.2. Software update
The WE500 firmware can also be updated from Devices → All devices → Software:
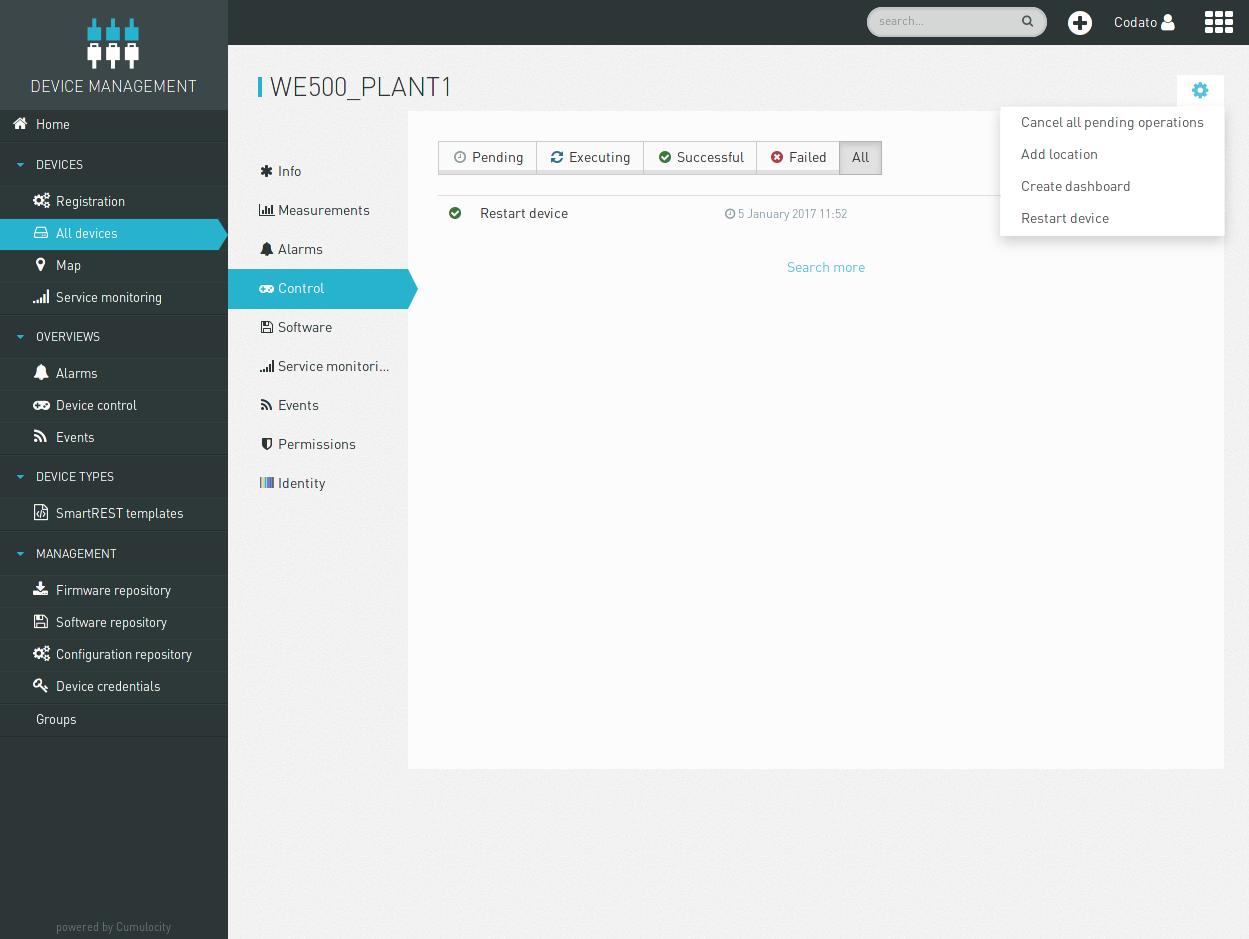
5.3. Restart device
WE500 can also be remotely rebooted from Devices → All devices → Control → Restart device: