1. Overview
A Virtual Private Network (VPN) enables a WE500 to send and receive data across a carrier network as if it was directly connected to the customer’s home or office private network.
Nethix’s SaaS (Software-as-a-Service) Portal offers a secure and reliable monitoring and control service for hundreds of devices through its dedicated VPN.
Some of the main advantages of using a VPN are the following:
- Encrypted communication between devices and Portal
- Encrypted communication between devices and customer’s PC
- Set variables in real-time (eg. pump on/off), no need to wait for device polling
- Update software and change configuration in real-time using reliable and secure channels
- Direct access to the web interface of each device
Through the VPN, a direct and secure channel can be established between the devices and the customer’s PC. This is quite useful for small to medium deployments.
To ease the management of big deployments, the same VPN can be used between the devices and the Portal for setting variables or upgrading software remotely.
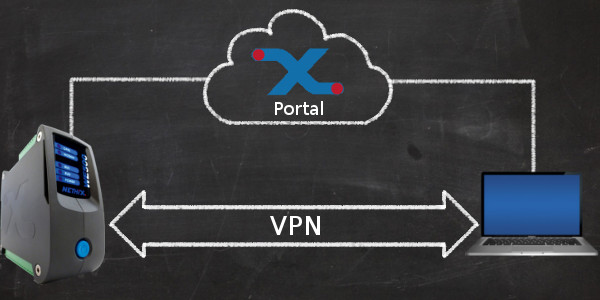
The above diagram shows the virtual channel created by the VPN using the physical connection that takes places through the Portal.
There is one VPN per Domain. Since a Customer can have one or more Domains, it can have one or more VPN. Each VPN will be associated to one Domain.
2. Installing the VPN client
In order to use a VPN, a client software must exist at both ends of the communication. The WE500 already provides a VPN client whilst the customer will need to install a client in its PC/Mac. Nethix recommends the use of OpenVPN as a client and therefore this manual explains how to install and configure it.
The OpenVPN client and the configuration files can be downloaded from the Nethix Portal following this straight-forward procedure:
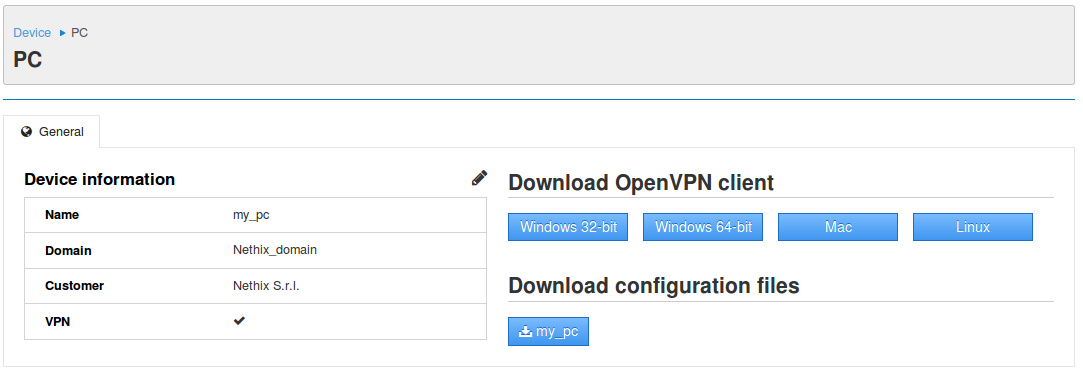
- In the Portal, go to the main menu and select the Devices option.
- Select the PC tab
- Select the PC in which the VPN will be installed. This assumes that the PC was already registered as explained in section PC/Laptops.
- In the PC/Mac, download the configuration file and open it in any folder. It will ask for a password that is the name of the PC that was given when it was registered. Using the above image as example, the password would be my_pc
- Download and install the OpenVPN client according to the PC Operating System:
2.1. Windows
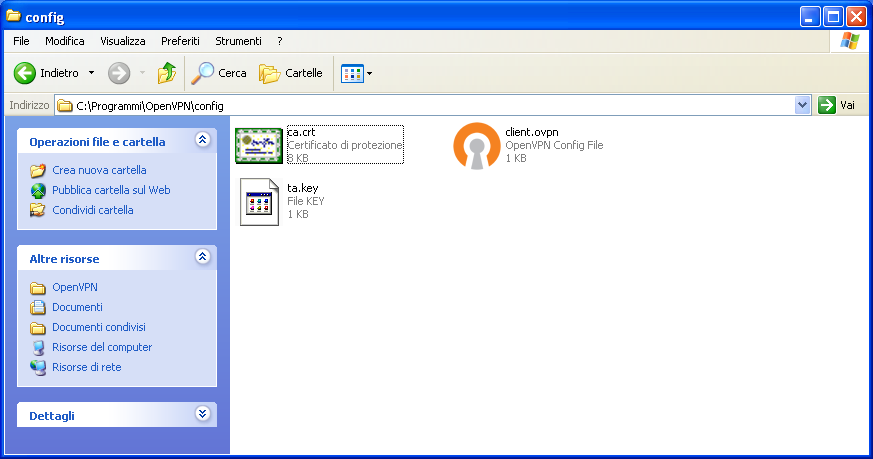
Double-click the downloaded file openvpn-install-<versione>.exe for installing it. Administrator permissions could be asked if logged-in as another user. Normally, the OpenVPN client is installed in the folder C:\Programs\OpenVPN.
Copy the configuration files opened in Step 4 to the OpenVPN folder C:\Programs\OpenVPN\config that was just installed:
Click on the OpenVPN icon in the desktop to execute the VPN client:

Go to the task bar and right-click on the OpenVPN icon and select the Connect option for establishing the VPN.

Finally, OpenVPN will ask for the user authentication. The username and password and are in the credentials file in the directory C:\Programs\OpenVPN\config.
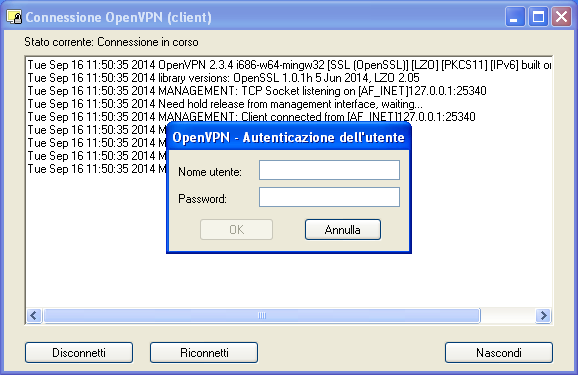
At this point the VPN will be established.
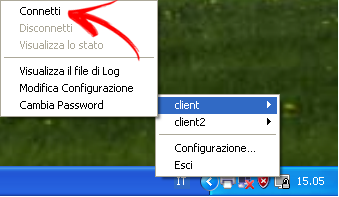
In the case that there are more than one VPN, first select the desired client and then select the Connect option:
2.2. OS X
Double-click in the downloaded file for installing it.
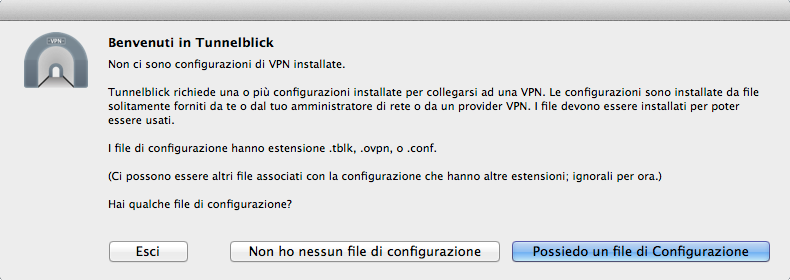
Execute the just installed Tunnelblick program and click on: I have a configuration file, then click on OpenVPN configuration and follow the instructions that will appear.
At the end of the guided procedure, click on Connect and enter the credentials found in the file credentials.
2.3. Linux
For distributions that use .deb packages such as Debian, Mint and Ubuntu, execute:
For distributions that use .rpm packages such as Fedora, OpenSuSE and CentOS, execute: