1. Overview
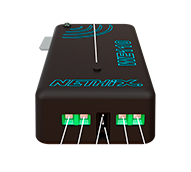
WE110 is a universal and user friendly GSM/SMS remote controller.
WE110 remotely turns-on/off and control electrical appliances using a mobile phone.
Just an SMS or a voice call is required to operate the it. WE110 can be used in remote control and home
automation applications:
Heating/Air conditioning
Preset the desidered temperature and turn on or off the system
Home/Building automation
Control lights, security systems, water irrigation, pumps and motors
Read also the WE110 Manual for gate opener.
4. Installation and setup
- Disable the PIN for the SIM card to be used in the WE110, using a standard GSM cell phone. Refer to the phone user manual for details.
- Insert the SIM card in the slot.
- Connect the thermistor. Connect the input and output signals to the controlled device as required by the application.
- Screw the antenna provided in the SMA RF connector, then connect power leads and power on the device.
System startup takes approximately 45 seconds, during which the LED in
the front side panel show diagnostic information as detailed in the following
table:
LED status at boot time
| LED color |
Status |
Descriprtion |
|---|

|
Fast blinking |
The WE110 is booting |
|
|
Turned-on for 5 seconds,
then it will reboot |
Network registration error or SIM error |

|
Fast blinking for 3 seconds |
From this moment, the WE110 is fully
operative |
LED status at normal operation
There are two normal conditions that are shown with two different LED status
- The system LED (green)
- The signal LED (red or blue)
System LED
In thermostat mode:
| LED color |
Status |
Descriprtion |
|---|

|
Slow blinking, each 0.6s |
The system is active and the relay is opened |
|
|
Turned-on |
The system is active and the relay is closed |

|
Turned-off |
The system is inactive |
In telecontrol mode:
| LED color |
Status |
Descriprtion |
|---|
|
|
Slow blinking, each 0.6s |
The relay is in pulse mode |
|
|
Turned-on |
The relay is closed |
|
|
Turned-off |
The relay is opened |
Signal LED
| LED color |
Status |
Descriprtion |
|---|
|
|
Turned-on |
The signal is good |
|
|
Slow blinking, each 0.6s |
The signal is sufficient |
|
|
Slow blinking, each 0.6s |
The signal is not good |
For example if the relay is closed and there is a sufficient signal, the LED status will blink in the following way:
All setup and control activities of the device are carried out sending and receiving SMS messages.
Note
The text in bold denotes strings to be typed and sent to the device.
For example, STATUS means that a SMS containing the word STATUS will be sent to the device.
WE110 can operate in two different ways, that can be selected using the SET command, as explained below:
- Thermostat: for both air conditioning and heating applications
- Remote control for general use
WE110 is factory preset to operate in heating thermostat mode.
To request systems status send a message to the device with the STATUS command. The device replies with a SMS carrying all the status information.
To enable the thermostat function and preset temperature to 20°C degrees send ON 20. To switch off the thermostat relay send OFF command.
GREEN LED in Thermostat mode:
GREEN ON, thermostat enabled, heating on
Blinking GREEN, thermostat enabled, heating off
GREEN OFF, thermostat disabled, heating off
To switch on the relay output, in general remote control mode, send ON command. To switch off the relay send OFF.
In both operating modes (thermostat and remote control) the output switch-on and switch-off can be controlled also sending a RING (i.e. calling the number of the WE110). WE110 hangs up and sends back a RING to the caller to confirm that the command has been received and executed. Note: this way of controlling output is enabled only if the caller number has previously been inserted in the users list, through the USER command explained below.
GREEN LED in general remote control mode:
GREEN on, output active, relay contact closed
Blinking GREEN, output active in pulsed mode
GREEN off, output disabled, relay contact open
WE110 can be programmed to reply with a confirmation message every time a command is received and executed. To enable the confirmation message send the command CONFIRM ON. To disable the feature send CONFIRM OFF.
6. Using the device: SMS
6.1. User management
Up to five users can be inserted in the users list. Only registered users will be able to operate the device and will receive messages in case of alarms or programmed input conditions.
To add user 1 to the list send the following command:
USER 1 <tel number>
For example:
USER 1 +391231231234 - Adds user 1 that has phone number +391231231234
USER 2 +394564564567 - Adds user 2 with a phone number +394564564567
To delete users from the list send the USER command followed by the number of the user to delete:
USER 1 - Delete user 1 from the list.
USER 2 - Delete user 2 from the list.
To receive the full list of enabled users send the USER command with no additional parameters.
6.2. Alarm management
When using the device in thermostat mode, the thresholds too-hot and too-cold can be preset. When the measured temperature reaches the preset thresholds the device sends an alarm message to all users in the users list.
To set the too-cold threshold (anti-freeze feature) send the command:
NOFREEZE 6 Too-cold alarm
The text Too-cold alarm is an example of the alarm SMS message. It can be customized by the user.
To set the “too-hot” threshold, send:
OVERTEMP 25 Too-hot alarm
The text Too-hot alarm is an example of the alarm SMS message. It can be customized by the user.
The command FREEZE ON programs the device to close the relay output automatically when the measured temperature goes lower than the too-cold threshold.
The command FREEZE OFF disables this feature.
When using the device in remote control mode, it’s possible to send a SMS when the input signal changes state. For example, the command
ALARM 1 ON 60 Alarm
sends a message with the text Alarm 60 seconds after the digital input is closed.
6.3. GSM signal level
To know the GSM RF signal level send the SIGNAL command. The device replies with a level number between 1 and 30:
- 1 to 7: GSM signal is too low for a correct operation of the device
- 8 to 12: GSM signal is low
- 13 to 18: GSM signal is good
- Higher than 18: GSM signal is very good
6.4. Factory reset
To restore the device to its factory default send the command DEFAULT.
6.5. Advanced SMS
| ALARM <input state> <ON/OFF> <delay> <message> |
|---|
| Enable an alarm condition: the WE110 sends the specified alarm message
when the digital input changes its state. It’s possible to program two
alarm conditions at the same time: one when the digital input contact
closes and one when it opens |
| <input state> |
0 – sends the message when the contact opens
1 – sends the message when the contact closes
|
| <ON/OFF> |
ON to enable
OFF to disable
|
| <delay> |
Delay in seconds before sending the specified
message when the digital input changes state |
| <message> |
The user-defined message |
| Example |
ALARM 1 ON 60 Alarm
Send an alarm SMS message 60 seconds after the
contact closed
|
| CENTER <SMS center number> |
|---|
| Set the operator’s SERVICE CENTER number |
| Example |
CENTER +393492000200
Set the service center of Vodafone Italy
|
| SMS service center numbers |
| Country |
Operator |
Number |
| Italy |
TIM |
+393359609600 |
| Italy |
Vodafone |
+393492000200 |
| Italy |
Wind |
+393205858500 |
| SET <mode> <offset> <delay> <param> |
|---|
| Set WE110 operating mode |
| <mode> |
Operating mode:
1: Heating thermostat
2: Cooling thermostat
3: Remote control for general user
|
| <offset> |
In Thermostat Mode: Correction applied to the
measured temperature (tenths of °C are added to
the measured value)
In Remote Control Mode: the time that the output
relay will remain closed when activated (when
zero the output is always ON/OFF, otherwise the
output is in pulse mode)
|
| <delay> |
In Thermostat Mode: output activation delay
In Remote Control Mode: Discarded
|
| <param> |
In Thermostat Mode: thermostat hysteresis in
tenths of °C
In Remote Control Mode: Discarded
|
| Example |
SET 1 10 120 5
Set WE110 to operate in heating thermostat mode,
with a correction on temperature measurement of
+1°C, a delay of 120 seconds and an hysteresis of
0.5°C. This means that when the thermistor
measures 18°C, the device switches on the output
at 19,5°C and switches off at 18,5°C, after a
delay of two minutes).
|
| CONFIG |
|---|
| Request device configuration |
| Example |
CONFIG |
| Reply message |
Thermostat:1
Mode:1
…
Hyst.:5
|
| VERSION |
|---|
| Request firmware and hardware version |
| Example |
VERSION |
| Reply message |
Fw Version:1.0.0 Hw:1.0 |
| HELP |
|---|
| Show command list |
| Example |
HELP |
| Reply message |
STATUS …
…
list of commands
|
| ALL <ON/OFF> |
|---|
| Enable/Disable any users to send SMS to the device |
| Example |
ALL ON
Any user is allowed to program and configure the
device regardless of the user list stored in the
device
|
| Example |
ALL OFF
Only users included in the user list stored in
the device are allowed to program and configure
it
|
Warning
After a factory reset the WE110 will function in ALL ON mode, so every user can program and configure the device.
Remember to set the device in ALL OFF mode after initial programming.
6.6. Chronothermostat commands
| CLOCK |
|---|
| Through this command it’s possible to get the time information, if
previously set on the WE110. |
| CLOCK MAN |
|---|
| Through this command is possible to set the clock in manual mode. The
WE110 will extract the correct date and time from the same command SMS.
In case of power failure, if the WE110 is in manual mode, all clock
settings will be lost until the next sending of a CLOCK MAN command. |
| USER 0 <phone>
CLOCK AUTO |
|---|
| The first command defines the number of the SIM Card inserted in the
WE110. This number must be recorded exclusively on position 0, in order
not to loose the time settings in case of device’s shut down. The WE110
extracts the time settings automatically from the CLOCK AUTO message
and sends an SMS to its own number everytime the device switch off/on,
in order to restore the time settings. |
| PROG <days> <starting time><temperature> [<starting time><temperature> <starting time><temperature> …] |
|---|
| With the command PROG it’s possible to set all configurations of the chronothermostat |
| days |
days of the week:
* 1: monday
* 2: tuesday
* 3: wednesday
* 4: thursday
* 5: friday
* 6: saturday
* 7: sunday |
| <starting time><temperature> |
starting time: it defines the starting time in 24 hours format 08:00
temperature: indicates the temperature required from the time set, expressed in format:
“T”+”temperature” in Celsius degrees T21
It’s allowed to set max 6 time intervals for each program. The time must be entered considering
mutiples of 15 minutes.
Instead of temperature it’s possible to set the switch off/on of the device through the
parameters OFF and ON.
The parameter ON, will take as reference the temperature originally set in the thermostat.
|
| Example |
PROG 125 08:00T21 09:30T18 11:15OFF 13:30ON 17:45T25 |
| CRONO |
|---|
| Switches on the chronothermostat function. |
| CRONO OFF |
|---|
| Switches off the chronthermostat function. |
| SWITCHON <temperature> <hours> |
|---|
| It switches on the thermostat for a certain interval, without programming the chronothermostat. |
| temperature |
- temperature: this is the parameter, that the WE110 takes as reference for setting the
- temperature.
|
| hours |
hours: this indicates the time the WE110 has to keep the set temperature before switching off |
| Example |
SWITCHON 23 4 |
6.7. Back-up battery (optional)
The device version WE110/B is equipped with an internal back-up battery, designed to send an SMS notification in case of power failure longer than 5 seconds time.
Independently from the pre-set mode, it’s possible to enable this function by using the command PWRMON:
| PWRMON <telephone> |
|---|
| It enables the notification of power failure. |
| telephone |
telephone: The telephone number defined to receive the SMS |
| Example |
PWRMON +391234567890 |
| Message text sent by the device in
case of power failure |
Power supply off |
To disable this function, send the following command:
| PWRMON OFF |
|---|
| It disables the function of power failure notification. |
Note
The internal battery powers the device for the time required to send the SMS notification.
After 30 seconds from the power failure the device will switch off.
7. Safety guidelines
- Nethix products support SIM cards from providers of all around the world, particularly from Europe Africa and Asia. However, there could be some incompatible SIM cards.
- The device cannot receive/send SMS nor RING if the SIM card is not enabled to GSM services and network or credit is not available (if prepaid card is used).
- Verify that the device is operated in an area covered by GSM network with sufficient signal strength for granting proper functioning.
- In case of questions or doubts regarding the cost of the SMS service consult your Network Provider.
- This device is only suitable for being installed by a qualified operator
- Nethix is not responsible for improper use and/or its side effects
- Nethix products are designed for typical use in industrial automation and/or home applications.
If you plan to use Nethix products in special applications where anomalies and discontinuity of service can have serious effect on human life or can cause physical or material damages, or where extremely high levels of reliability are required (for example in aerospace systems, in atomic energy control systems or n electro-medical devices), please contact Nethix for support to your particular application. Nethix is not responsible of damages caused from its products if such applications are not previously authorized.
 The product shall not be treated as household waste. It shall be instead handed over to an appropriate collection point for the recycling of electrical and electronic products. For further information about recycling of this product, contact the local city office and/or the local waste disposal service.
8. Warranty and support
Nethix warrants to the buyer that the product will be defect-free within two years (24 months) from the date of purchase.
During warranty time, and against presentation of purchase invoice, the product will be repaired or replaced, at Nethix’s discretion, without any additional costs as regards spare parts and repair, if the damages are proven to be manufacturing defects.
Warranty will be voided if the product has not been used properly.
In case of technical problems the user can ask for support:
9. Return and repair
Product return to NETHIX must be previously authorized, requesting a RMA number.
Please send an Email at Nethix containing all following information:
- Complete customer’s name and address
- Distributor’s or Reseller’s name and address
- Date of purchase
- Product P/N and S/N as displayed on the product or the package
- Detailed description of fault and/or reason for return
Nethix will communicate the RMA number, in order to start the return procedure of the product.
The delivery of the goods shall be arranged DDP at Nethix premises.
Products returned without factory seals will be automatically treated as out-of-warranty repair services.